Integration Overview
How It Works
BindID is based upon the OpenID Connect (OIDC) standard—offering you a simple and easy deployment. The BindID SDK makes integrating even easier.
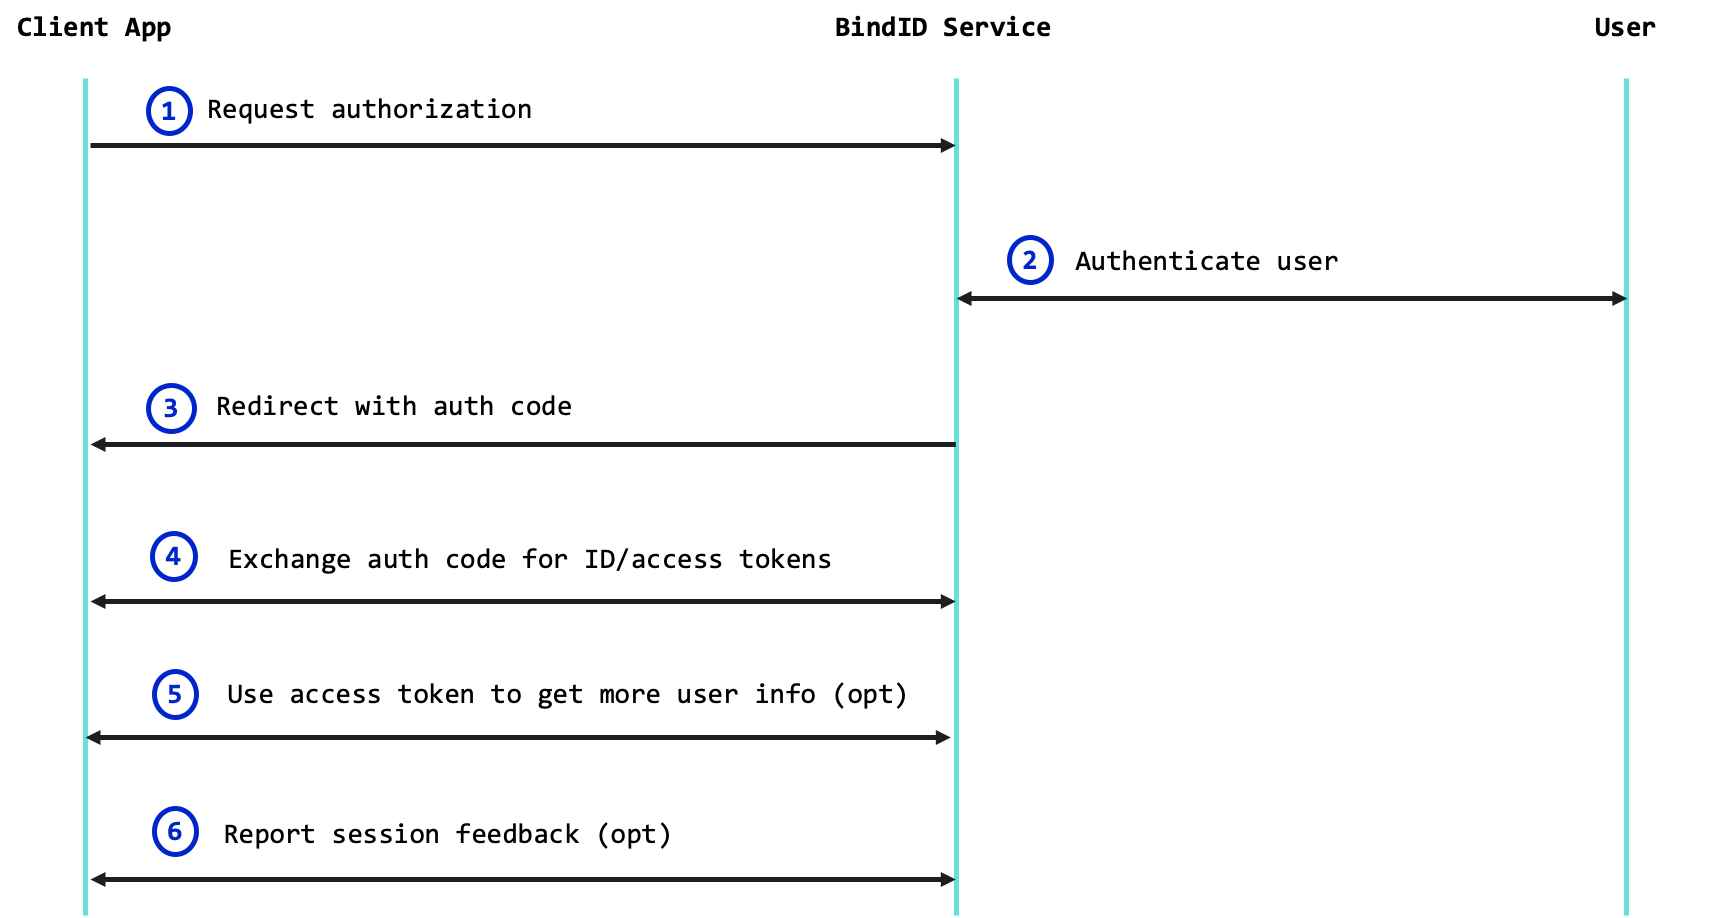
- Your app uses the BindID SDK to request authorization with the BindID Service.
- BindID authenticates the user using strong authenticators supported by the mobile deviceor computer.
- BindID returns an auth code to your redirect URI.
- Your app uses a backend API to exchange the auth code for ID and access tokens containing info on the authenticated user.
- If needed, your app uses a backend API to access
UserInfo. - If needed, your app uses a backend API to report additional authentication you performed for the user and set a user alias.
Architecture
The following diagram provides a high-level illustration of the BindID architecture:
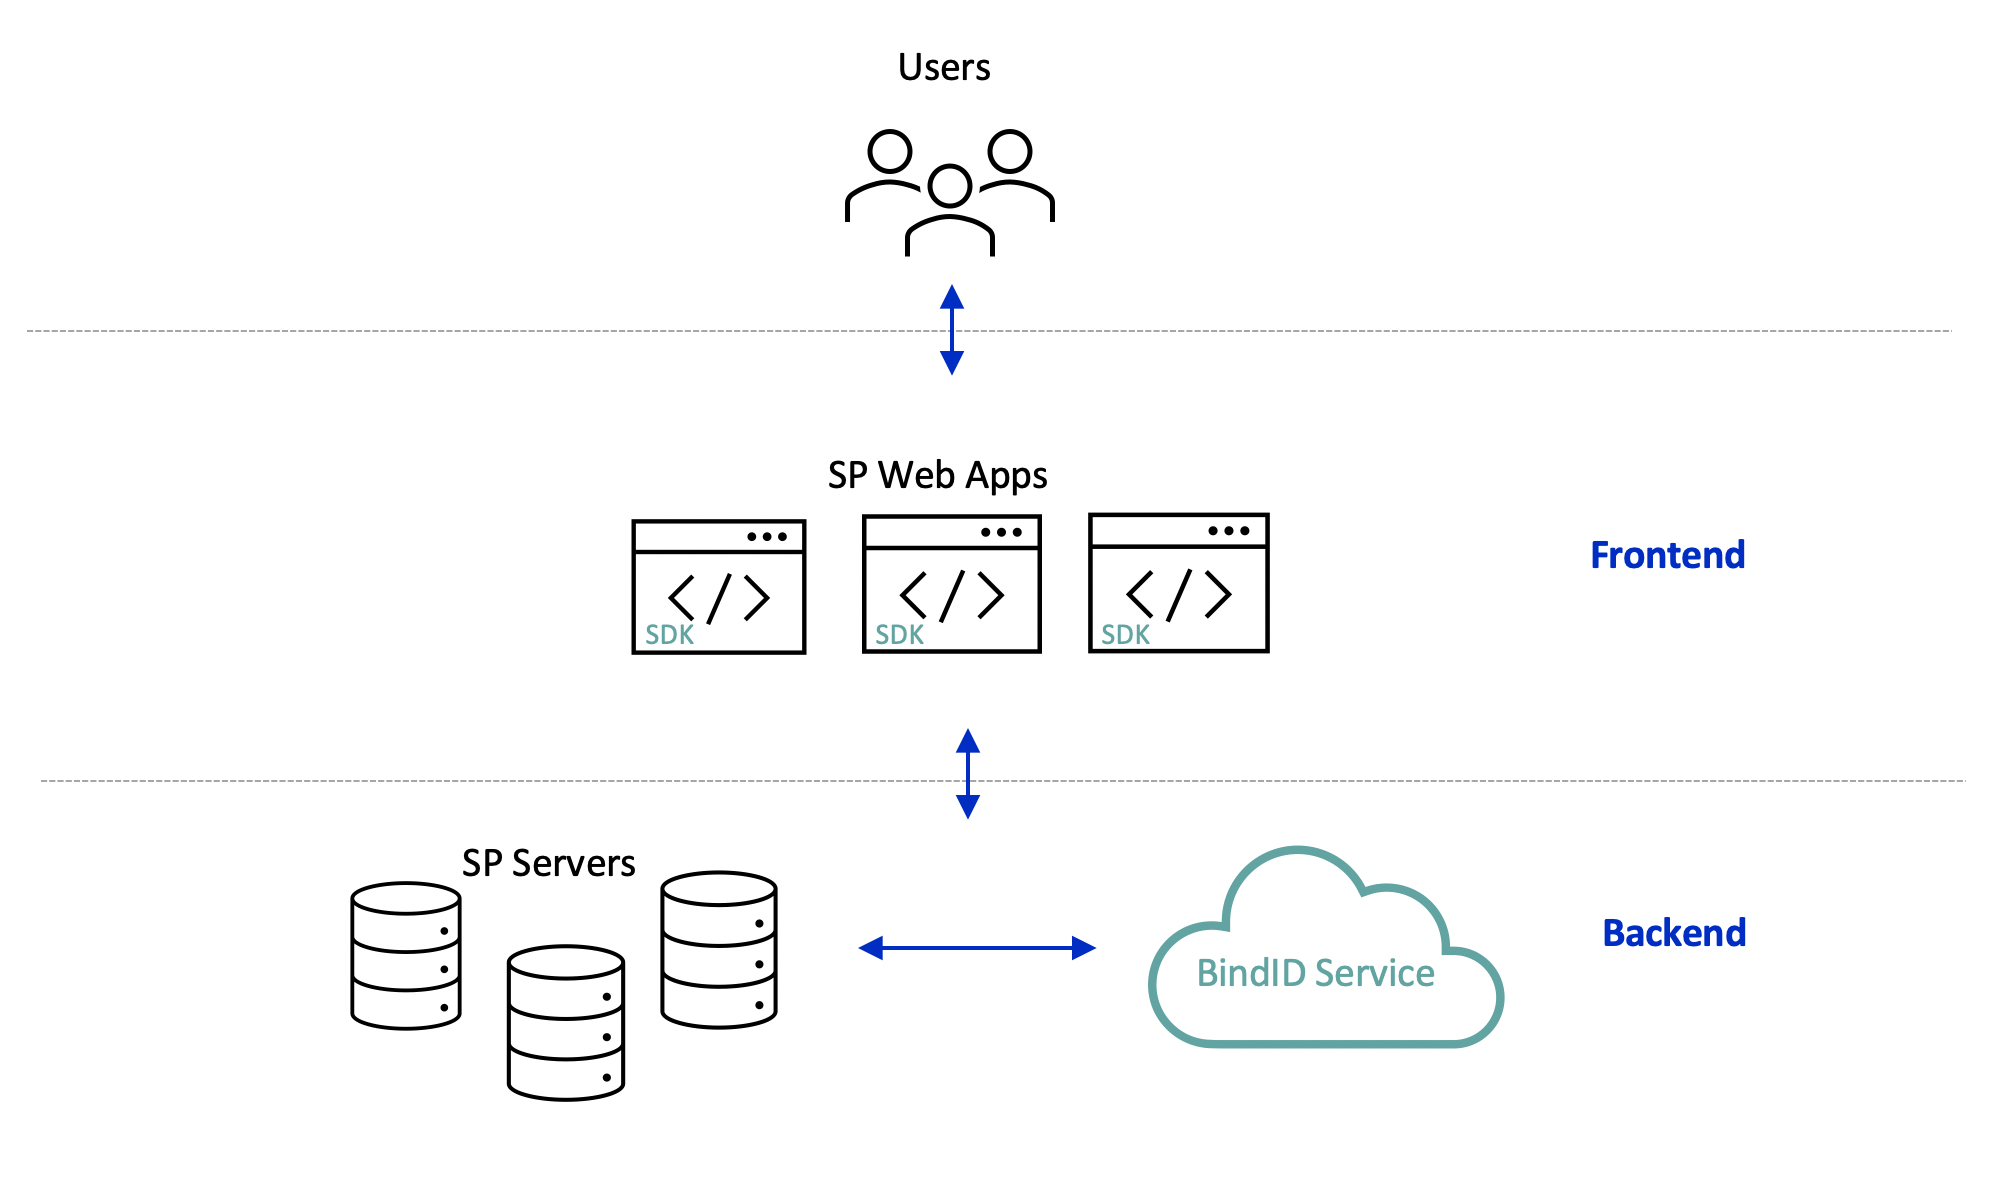
The BindID architecture includes the following:
- Users—Each associated with one or more devices and authenticators
- Service Provider Frontend—Web applications integrated with the BindID SDK, running on a Browser
- Service Provider Backend—Servers used to host the web apps, and invoke backend BindID APIs
- BindID Service—Server used to execute the BindID authentication process and backend BindID APIs
Integration Steps
Step 1: Enroll with BindID Service
Enroll with BindID to get your credentials, customize your branding, and configure other provider-level settings.
Integrate the client SDK into your application, which will be used to execute an OIDC-based authentication for the user.
Step 3: Get User Identity and Trust
Implement the backend OIDC /token API used to exchange the OIDC authorization code for an ID token, which identifies the user and contains trust indicators. If needed, you can integrate the OIDC /userinfo API to exchange your access token for the user info.
Implement the OIDC /jwks API used to validate ID tokens obtained from the /token endpoint.
Step 5: Provide Session Feedback
Implement the session-feedback API used to report direct authentication you execute for the user and set a user alias, so that it will be reflected in the ID token for subsequent requests.